Embedded
![]() Arduino is an open-source electronics platform that is designed to make it easier to develop interactive embedded- projects and prototypes. Arduino boards are based on microcontrollers that can be programmed using a simplified version of C++ programming language. Arduino boards have a variety of inputs and outputs, including digital and analog pins, which can be used to connect to sensors, lights, motors, and other components. By using these inputs and outputs, you can create a wide range of projects, from simple LED light displays to complex robots.
Arduino is an open-source electronics platform that is designed to make it easier to develop interactive embedded- projects and prototypes. Arduino boards are based on microcontrollers that can be programmed using a simplified version of C++ programming language. Arduino boards have a variety of inputs and outputs, including digital and analog pins, which can be used to connect to sensors, lights, motors, and other components. By using these inputs and outputs, you can create a wide range of projects, from simple LED light displays to complex robots.
The Arduino platform has become extremely popular among hobbyists, students, and professionals alike, due to its versatility, ease of use, and low cost. The platform has also support of a large community of developers who have created a wide range of libraries, tutorials, and example projects. This community has made it easier for individuals to learn how to use the platform and has helped to foster innovation and collaboration in the development of new projects and applications.
Getting started
The best way of starting writing code for your Arduino board is by using the Arduino Integrated Development Environment; Arduino IDE.

Follow the next steps to install this on your laptop:
- Go to the official Arduino website and click on the "Software" tab in the top menu.
- From the menu click on "Software", and look for the "Downloads"-content.
- Choose the appropriate version of the software for your operating system. For example, if you're using Windows, click on the "Windows (win 10 and newer, 64-bits)" link to download the installer.
- Once the download is complete, open the installer by double-clicking on the downloaded file.
- Follow the prompts in the installer to install the software on your computer. You may need to grant permission for the installer to make changes to your system.
- Once the installation is complete, launch the Arduino IDE. You should see a window with a blank sketch open.
- Connect your Arduino board to your computer using a USB cable.
- In the Arduino IDE, go to the "Tools" menu and select "Board." Choose the appropriate board type from the list.
- Go back to the "Tools" menu and select "Port." Choose the port that your Arduino board is connected to.
- You're now ready to start programming your Arduino board! Begin by typing your code into the sketch window, and then click the "Upload" button to send the code to the board.
Congratulations, you've successfully installed the Arduino IDE and are ready to start exploring the world of electronics and programming!
Programming your WeMos (ESP)
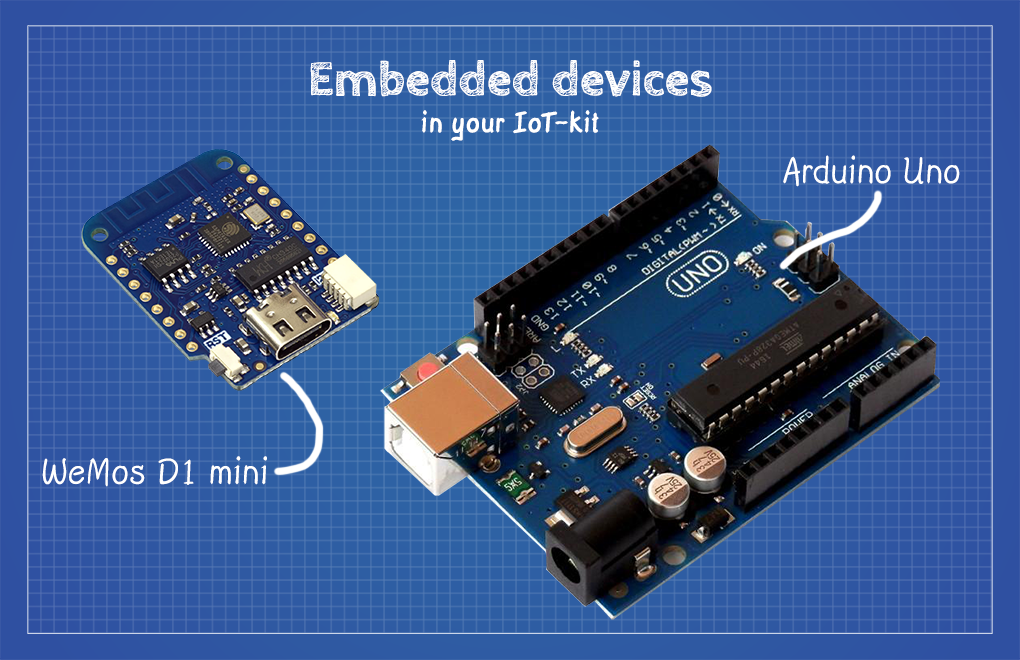
In the kit you bought from us you received two embedded devices; The Arduino Uno and the Wemos D1 Mini. The Arduino Uno works out of the box with the Arduino IDE. For your Wemos you need some additional configuration.
Follow the next steps to configure the Arduino IDE to work with your Wemos:
- Start the Arduino IDE and go to "File" > "Preferences..."
- Enter
http://arduino.esp8266.com/stable/package_esp8266com_index.jsoninto the input-field of "Additional boards manager URLs". You can add multiple URLs, separating them with commas. - Open "Boards Manager" from "Tools" > "Board menu" and search for "esp8266".
- Select the version you need (most likely the latest one) from the drop-down box and click the "Install"-button.
- Now connect your WeMos to your computer and select the board-type: "LOLIN(WEMOS) D1 R2 & Mini" in the "Board menu".
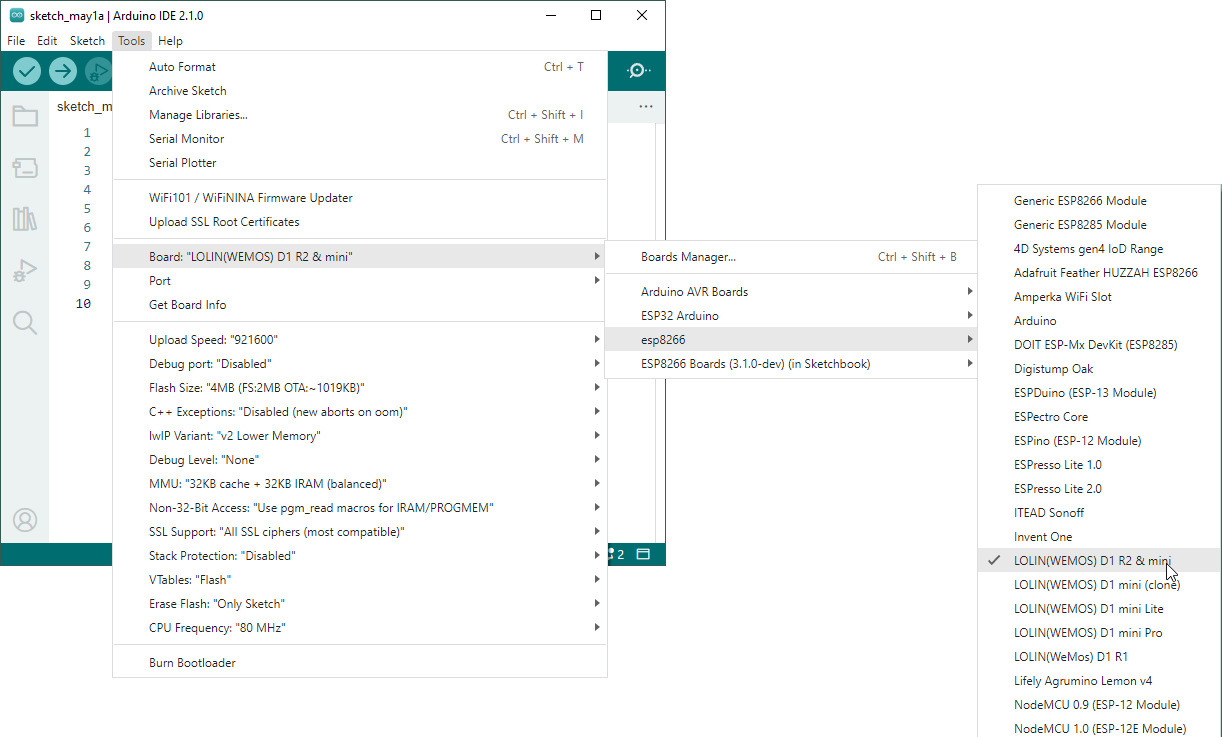
- Every time you switch using boards you have to select the corresponding board-type.
Resources
Read everything about the WeMos D1 mini here (make sure you use V4.0): https://www.wemos.cc/en/latest/d1/d1_mini.html